
Ahh yes. Burgers. The Iconic All-American Classic (although interestingly, it may have originated in the city of Hamburg, Germany). At the very core of it, it’s a simple sandwich that’s easy to make and highly accessible. This gives it such a great reason why it’s such a popular and familiar meal across the board; whether it’s from your favorite uncle doing a backyard BBQ, or from a high end Gordon Ramsay restaurant that can justify a $200 price tag by adding the word “real truffle” to the burger description.
Despite it’s popularity and familiarity, I have come across so many different ways and conflicting techniques that many claim to be “the best and only way to make a proper burger”. Researching around, I found that such techniques range from being as simple as sprinkling salt and pepper on a patty and throwing on a grill, to something as outrageous as having to sacrifice a cow on top of a mountain to the Burger Gods during a full moon in order to obtain perfect burger juiciness (ok, not really).
One technique that I found particularly interesting was the idea of keeping your ground beef running straight in the same direction when forming patties, similar to the straw picture shown below:

So what’s do you mean? What’s the big deal? When you traditionally mix and mash together your ground beef, generally you are creating multiple layers of meat on top of each other, which can actually sacrifice tenderness and texture. Keeping the direction of the ground beef in the same uniform direction (as per the example of the straws) can really enhance texture and juiciness. Your teeth are essentially biting in the same parallel direction of the meat, giving you truly next-level burger tenderness. I definitely recommend giving this technique a shot.
In this recipe, I opted to making 1 1/2 inch patties and made use of my Anova Nano Sous Vide, which will ensure that the thicker patties will be cooked to desired level of wellness throughout.
Ingredients (for four 8-oz, 1 1/2 inch thick burgers)
-2 lbs of ground beef (preferably 85% lean, 15% fat)
-Hamburger buns
-Kosher salt (to season)
-Black pepper (to season)
-Cheese slice of your choice (I used pepper jack in this recipe)
-Toppings of your choice (Lettuce, whole onions, grilled onions, tomato, etc.)
-Dressings of your choice (ketchup, mayo, home-made In-N-Out style sauce <–recipe coming soon!)
-Neutral oil (if searing on a pan)
Useful Tools
-Sous Vide
-Kitchen Balance/Scale
-Circular food mold (3.15 x 1 1/2 inch)
-Grill, or pan to sear
Procedure
i) Fill a pot or sous-vide container with water and preheat your sous-vide to the desired temperature
a) Rare: 115°F-123°F
b) Medium Rare: 124°F-129°F
c) Medium: 130°F-137°F
d) Medium-Well: 138°F-144°F
e) Well Done: 145°F-155°F
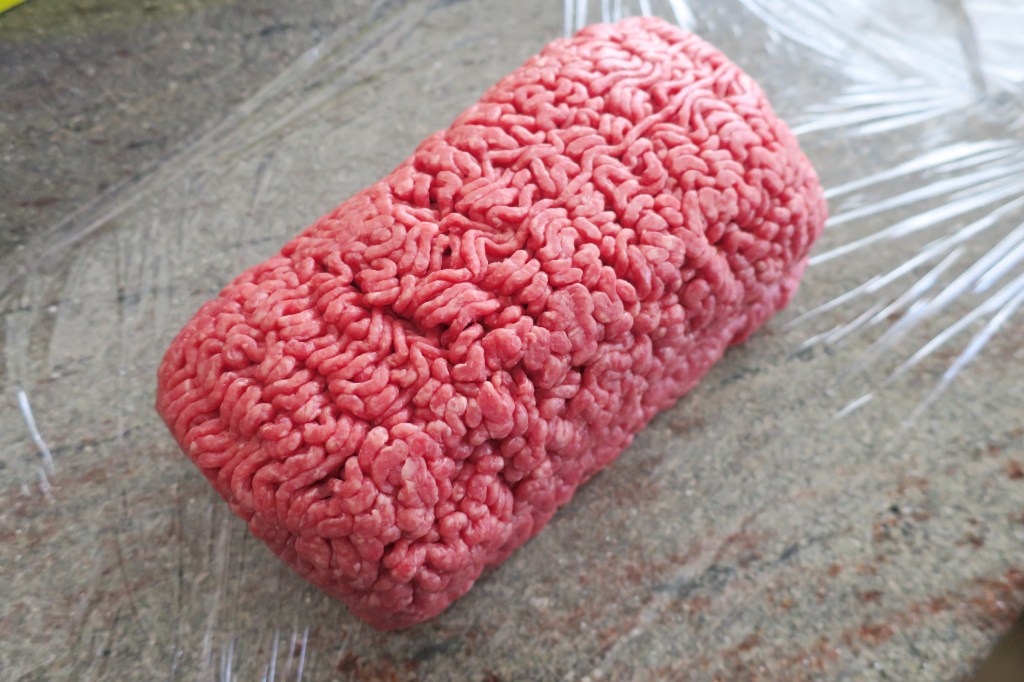
1) Shape your ground beef into a cylindrical shape as shown below. Match with the diameter of the bun size. Maintain the unilateral direction of the beef as shown below.
2) Wrap the cylinder in plastic wrap and compress to avoid the patty from falling apart.
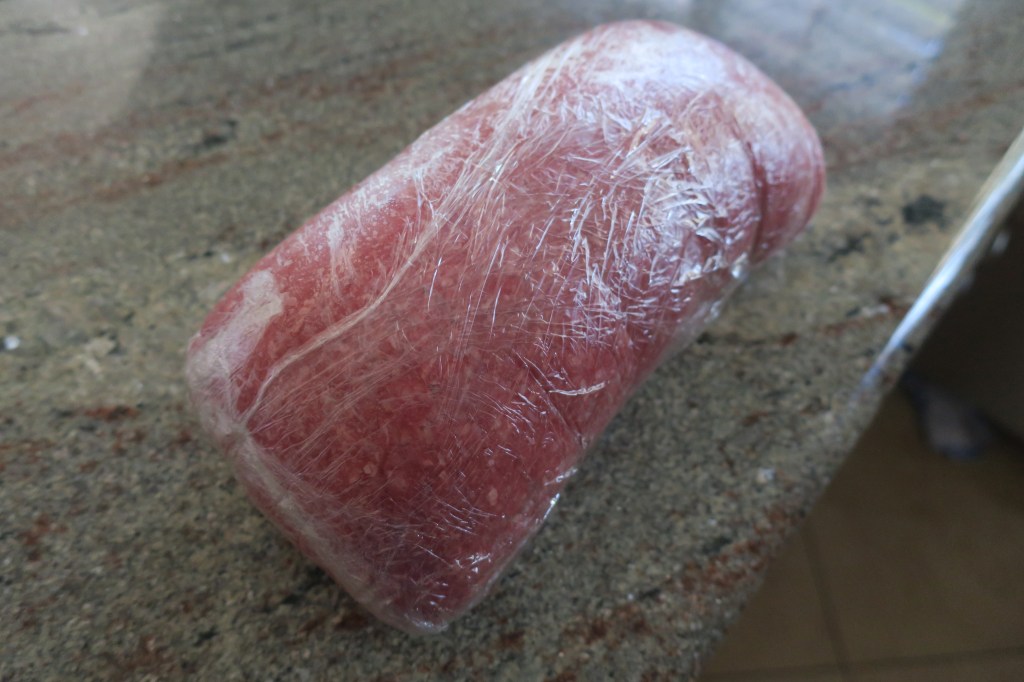
3) Place the cylinder in a fridge for at least 30 minutes to help cool the meat and maintain it’s shape
4) Once cooled, remove the cylinder from the plastic wrap. Cut approx. 7-8 oz of meat (a kitchen scale will help with this). Form the patties into nice cylindrical shapes (a cylinder food mold will help, or a square one if you like Wendy’s square patties).
5) Season both sides of each formed patty with kosher salt and black pepper
6) Place each patty into a separate resealable bag. Place the bag into the pre-heated sous vide bath, and release any air with the water displacement method.
7) Allow each patty to cook for approx 1 to 1.5 hours.
8) Remove the patty from the bag and pat all sides dry.
9) Prepare your grill or stove-top pan for searing. Sear both sides for approx 15-20 seconds. During this time, place your cheese on the first-seared side and allow to melt onto the patty.
10) Place seared patty on a bun. Serve with your favorite toppings or dressings.
Observations/Tips
-Approximate Time: 1.5-2 hours
-Toasting your buns will add a nice crisp and texture to your burger
-Use a ziplock/sandwich bag as opposed to a vacuum sealer. Due to the fragile nature of the patties, the force from vacuuming may deform your patty
-The water displacement method involves partially sealing a resealable bag, leaving a small opening. Slowly immerse the bag into the sous vide bath, and allow the water pressure to force air out of the bag. Tightly close the bag once the meat is submerged (careful not to let water physically get in the bag).
-Attach a clip on top of the bag and clamp to the top of the water bath to hold in place. Use a heavier bag clip at the bottom of the bag to help keep the patty submerged underwater.
References and Useful Links:
Insider Article: https://www.insider.com/how-to-make-hamburger-patties-2016-7
FoodFunTravel: https://foodfuntravel.com/where-did-hamburgers-originate-who-invented-the-hamburger/
Straw Picture: Marco Verch Photography: https://www.flickr.com/photos/30478819@N08/29987537097
